|
Part 2 of the digital Mask
|
| SIMPLE MASK Part 2
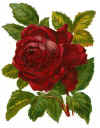
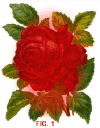
Applying the faded oval mask 1. If you don't already have your faded oval mask open, open it in PSP and minimize. 2. Download the "rose.jpg" graphic or use one of your own and open in PSP. 3. With the rose.jpg open click on the "layer palette" on your toolbar and click on the white document icon on upper left hand corner, to add a new layer using default settings. Make sure the new layer is highlighted (see fig 1). 4. Click on <masks menu> on toolbar then on <new> then on <from image>. You should see a dropdown menu. Click on arrow and choose "oval_faded." 5. A mask has been applied to the new layer but you can't see it. To see it, go to the mask menu and click on <view mask>. You'll see a pink shadow where the mask is (see fig 2). 4. Now you will color the mask. We will use white for now. If your foreground color is not already white, go to the color toolbar on the right side of the screen and click on foreground color (see 2 overlapping rectangles--one on upper left is foreground and one on lower right is background color--see fig 3) and a color palette will appear. Click on one of the white squares.
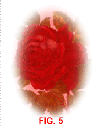
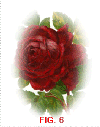
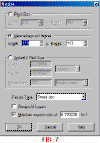
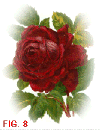
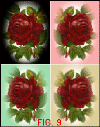
5. Click on the flood fill tool (little bucket) on the toolbar on the left hand side of your screen. Click on the tool options palette on toolbar (see fig 4) and make sure you choose "solid color" and that your opacity is at 100. Place your cursor with the little bucket over the graphic and left click (left click is for foreground color and right click is for background color). Your graphic will look like fig 5. 6. Go to mask menu and uncheck "view mask" to remove pink shadow. If you like the way it looks (see fig 6) you can leave it like that and click on layers menu and <merge all>. Save graphic as jpg or format of your choice. 7. I wanted more of the leaves to show so resized the mask layer. Make sure the layer with the mask is highlighted in the layer palette. Click on the <Image menu> then <resize>. You want to make the mask layer larger so I use the percentage boxes. I put in 110%, and make sure the <resize all layers> box is NOT checked (see fig 7). Click on okay and repeat if you still want it a little larger. The final graphic should look like fig. 8. Go to <layers menu> and "merge all" layers and save in format of your choice. 8. If you want to place your graphic on a web page or digital project, you can color the mask the same color as you page background. I sometimes will choose a dominant color in the graphic I'm masking. Fig. 9 shows the same graphic with different color masks.
|
