|
Paper Beads |
| Supplies:
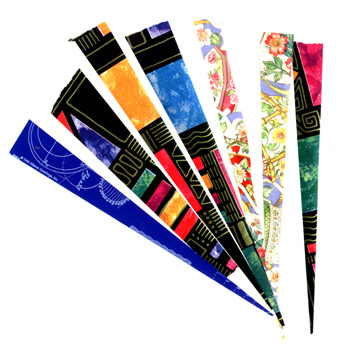
A variety of different papers, I have found that the thinner / more flexible the paper, the easier the bead is to make. I used several different weights, textures & types of papers & had varying results with each. I liked wrapping paper the best. It didn't curl as much as the Origami paper or tear like tissue papers will and there are thousands of patterns to choose from. Glue, I used ‘Mod Podge", it is available in, gloss luster (it dries clear & shiny) & matte finish (it dries clear & not as shiny). Use what ever glue you like best. Scissors or a paper cutter (I found the paper cutter to be much easier & faster) Coffee stirs (from your local fast food restaurant) Get the round ones that look like thin straws. Cotton Swabs (The cotton swabs are rather short & allow for 1 bead per stick, the coffee stirs allow for 2-3 per stick). Be sure to use a plastic stick, the beads will stick to a wooden stick such as a shish-ka-bob stick. As you will see a few drying in the rack below. I found this out the hard way. A shallow cardboard box, slightly wider than the longest coffee stir or swab. A paint brush for applying the glue. If you are using cotton swabs, remove all the cotton from the ends. Don’t throw this away because you can use it as an added touch to your beads. Take your card board box & cut notches along both of the long sides. This is what you will be ‘hanging’ your sticks from so the beads can dry. Cut your papers into ½" – ¾" wide strips, about 6" in length at an angle. The paper cutter makes this much faster. (Wide at one end, narrow on the other) The longer you cut your strip, the thicker (bigger) the bead will be when finished.
|
 |
| I lay my paper strips onto a protected work area (use a
big piece of scrap paper) & apply the glue to the back of the strip
using a paintbrush. Spread the glue thinly on the wrong side of your
paper, pick up your stick and paper & starting with the wide end of
your paper strip, roll the paper onto your stick, slowly & evenly
making sure to smooth the paper as you roll & keep your edges even.
If you want to get fancy with your beads, cut some paper into narrow strips & layer these strips, starting with the wide end, over the center of the bead you just rolled. Using a contrasting color will add extra color & interest to your bead. This layer will also add thickness, so keep it short (about 3"-4") Place your beaded stick on to your drying rack (the notched card board box)
|
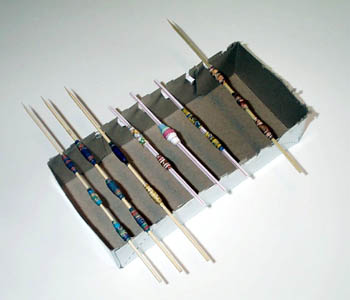 |
| And allow to dry thoroughly.
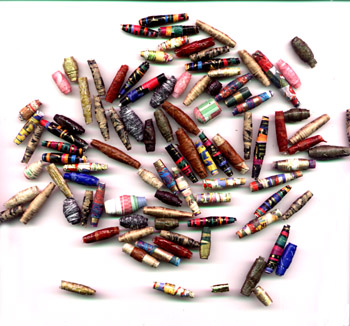
During the drying process, be sure to gently loosen the beads every 2 or so hours or they’ll be difficult to remove from the stick ( They will stick, if not loosened). When the beads are dry, & still on the stick, you can coat them with a thin coat of clear fingernail polish or use the Mod Podge (mat finish for a dull look, gloss for a shiny look). Allow to dry, remove from the stick. Your beads are now ready to use for stringing. Create
necklaces, bracelets or use as embellishments in collages, on tags or
other paper arts.
|
 |
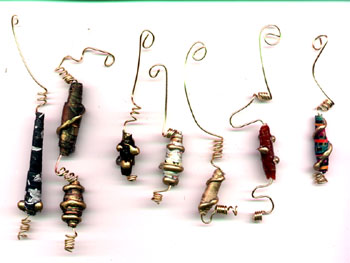
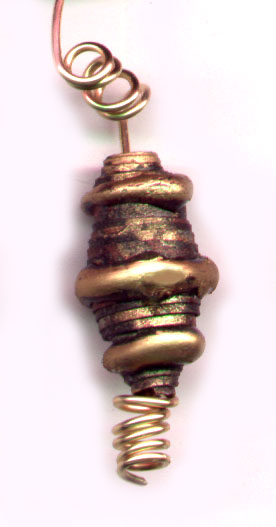
| Decorating your beads: There are many ways you can decorate your beads. A walk through the craft store will inspire you. Some of my favorite ways to decorate my beads are with, Metal Leaf Below are a few beads that are decorated by using a hot glue gun & rub-n-buff and strung on copper wire. |
 |
 |
|
This tutorial was contributed by: Rebekah Hodous
|
|
|