|
Digital Masks Part 3
|
| SIMPLE MASK AS A GRAPHIC
Try this after you've done Simple Mask Pts 1 & 2 to get the look of rubberstamping with rainbow inkpads. 1. Download "fish.jpg, open in PSP 6 and minimize.
2. Open a new image size 350 x 150 with a white background @ 16.7 million colors. 3. Add a new layer to the new image. 4. Click on the flood fill tool on toolbar on left side of screen (bucket). 5. Click on Tool Option Palette. On first tab of flood fill menu showing a bucket click on "fill style." Choose any gradient you'd like. I chose "linear gradient." with opacity of 100. Other settings should be normal or none (fig 1).
6. Click on second tab with the small gray gradient. Settings should be zero. Click on "Edit," which will take you to another menu (fig 2).
7. There you will see a list of the default linear gradients that come with PSP 6. You can also create your own. I chose purple-blue-orange. You will see the sliding scale with the colors in the gradient. You can adjust the gradient by sliding the little arrows from side to side or even changing the colors by clicking on the color squares. Experiment by clicking and moving everything to see what happens (fig 3).
8. Once you've chosen your gradient, click the bucket cursor on the new layer. If you don't like it you can undo and adjust the gradient (fig 4).
9. Add a new layer for the mask. Go to <Masks menu> and click on <new> then <from image> then in the drop down menu click on fish. You will not see the mask until you color it. To see the mask click on <mask menu> then <view mask> to see a pink shadow mask (fig 5).
10. You can color the mask any color you'd like by clicking on the
flood fill tool again. I used another linear gradient called "blue
fading" after adjusting the colors where I wanted them. I clicked
on mask layer with the bucket cursor
Go to <mask menu> and uncheck <view mask> to get rid of the pink shadow. 11. Fig 7 is the final graphic to which I added a border by clicking on <image> menu then <add border>. The border will be whatever color you choose as the background color. The numbers represent the width of the border in pixels. I chose 4 pixels wide and symmetrical.
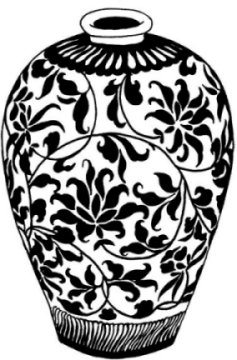
12. Fig 8 is the same process done with "vase.jpg" graphic, which is available for download so you can try it on your own.
13. By the way instead of flood filling the background or coloring masks with solid colors or gradients, you can also use patterns. I save all kinds of backgrounds from the internet as seamless tiles to use for just this purpose. To do this open the pattern/tile you want to use and minimize. When the flood fill menu is open, instead of choosing a gradient or solid color, click on pattern. Then click on the tab with the grid and on the drop down menu click on the name of your pattern. Flood fill the same as you did with the gradients.
|