|
Digital Masks using Paint Shop 6
|
| SIMPLE MASK (Part 1 of 3)
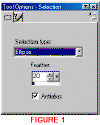
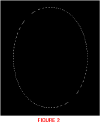
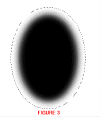
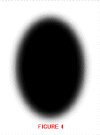
Creating a simple faded oval mask in Paint Shop Pro 6 A mask is like a stencil and can be positive and negative. Any black image can be used as a mask as long as you increase the colors to 16.7 million colors. We are going to create a very simple oval mask with faded edges. 1. Click on new document in PSP 6 or on the blank page on the tool bar. 2. Use these settings: pixel size=300x350, resolution=72, background color=black, colors=16.7 million. 3. On toolbar on left side of page, click on selection tool which looks like a square with dotted outline. 4. Click on toggle tool options window on top toolbar. 5. Click on blue heading to activate and choose these settings: Ellipse, feather=20, antialias box checked (see fig 1). 6. Place cursor in middle of document and drag an ellipse giving yourself plenty of room for the feathering around the ellipse. If you made it too big just undo and make it over again. 7. You should see the "marching ants" around the ellipse (see fig 2). Go to <Edit> and <Copy> 8. Open a new document with the same settings except make the background color white. 9. Click on the layers tool (looks like overlapping blue and red squares). 10. Activate by clicking on blue border and then click on white document icon on top left corner to add a new layer using default settings. Make sure the new layer is highlighted. 11. Click on <Edit> and <Paste> "as new selection." 12. Move the mouse to center the oval or click on the oval until you see the little cross which will enable to center the oval with the mouse or touch pad. You should see a black oval surrounded by marching ants (see fig 3). 13. At this point you can leave the oval as is or add more feathering by clicking on selection>modify>feather. 14. Once you are satisfied with the image then go to selections> "select none" to deactivate the marching ants. 15. Go to layers>merge>all. If you have too much white space around your mask you can also crop a little but make sure you leave some white space around the mask (see fig 4). 16. Save image as "oval_faded.jpg" (or name and format of your choice). 17. Create a folder on you hard drive (I have a folder in "My Documents" named PSP where I created a subfolder called "Masks") so that if you have to uninstall and re-install PSP, you won't lose your masks. 18. You've now created your first mask. If you don't have some of the icons I mentioned on your toolbar then in PSP go to <File> <Preferences> <Customize Toolbar> to add them. Next tutorial will be how to apply the mask.
|
|
This tutorial contributed by: Teresita |


